
Create a Print Ready PDF in InDesign in 4 super easy steps
If you are dealing directly with a print company it is important to supply them with a correctly produced print ready PDF. This saves them time by having to either come back to you with issues or having to amend themselves which could incur additional costs.
Step 1
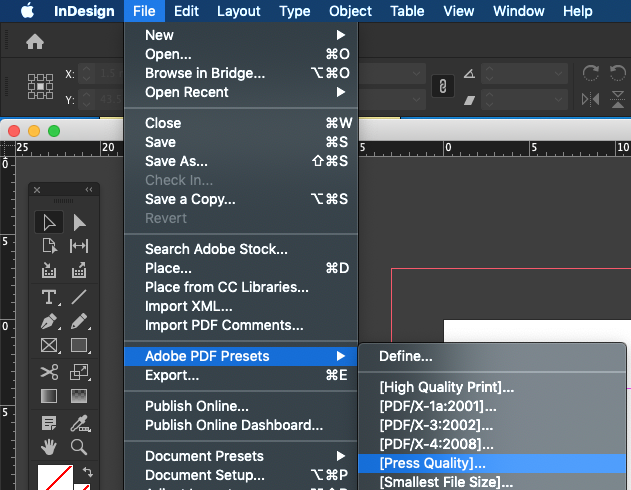
Once your InDesign document is complete and you are ready to produce a PDF, go to FILE > Adobe PDF Presets > Press Quality.
Step 2

Select the filename and destination you wish to save the PDF.
Step 3
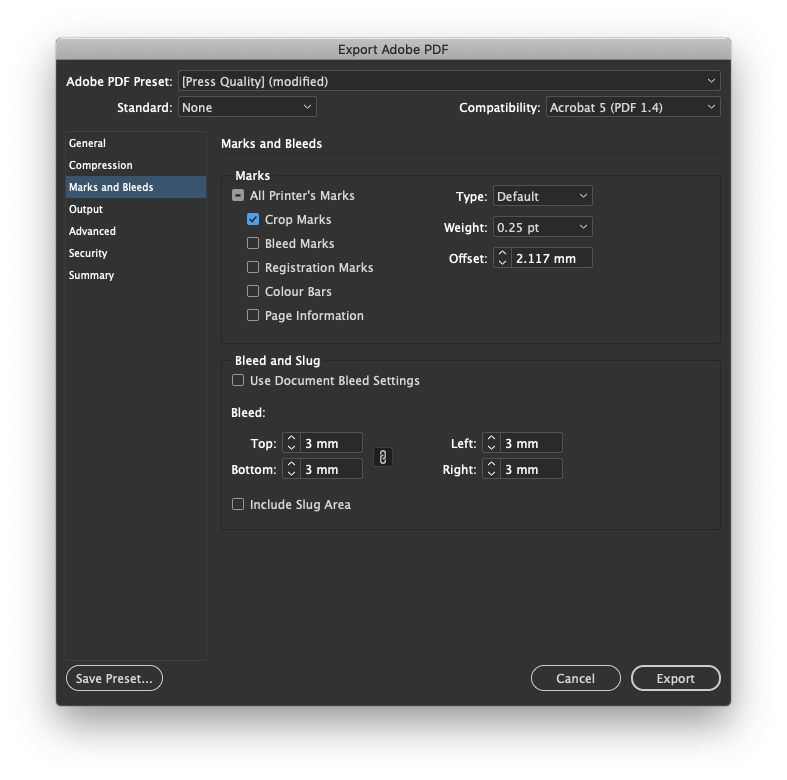
On the left hand side, go to ‘Marks and Bleeds’ then on the right side select ‘Crop Marks’ (other checkboxes are optional).
Go down to ‘Bleed:’ and select 3mm in all 4 boxes (Top, Bottom, Inside, Outside).
Step 4
Click Export.
And there you have it a print ready PDF that is suitable to send to your print company.
There are other factors that will need to be addressed at the artwork stage which you can read in this article The ultimate 5 step guide to creating print ready artwork.


Leave A Comment